Inviting team members to a project
Learn how to invite project members to your project on Bimefy.
Adding Project Members to the Project
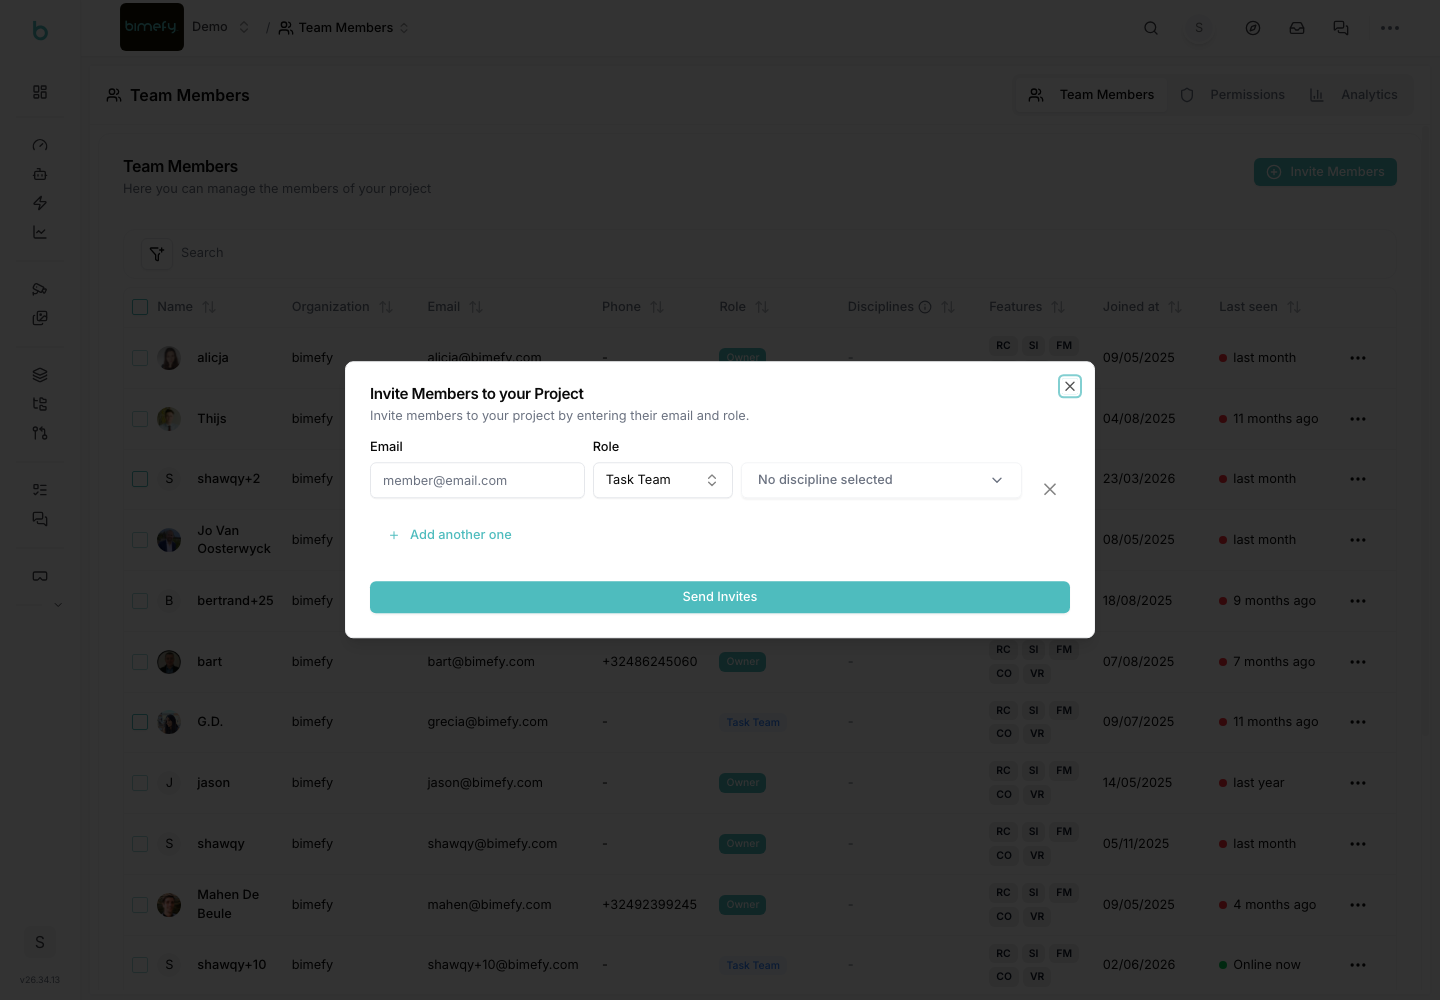
Collaborating with your team is a key part of any BIM project. Here’s how you can add members to your Bimefy project:
1. Accessing the Members Section
- Navigate to the Settings Menu:
- On the left-side menu, locate the Settings section.
- Click on “Members”:
- Within the Settings section, click on the Members button to manage your project team.
2. Inviting Project Members
- Enter Member Details:
- In the Members section, you’ll see an option to invite new members.
- Enter the email addresses of the individuals you want to invite to the project.
- Assign a role to each member: Owner, Approver, Task Team, or Consumer. See the Roles and Disciplines guide for what each role can do.
- Assign the relevant discipline(s) (e.g., ARC, ENG, MEP, OTHER, or SHARED) so the member's access is scoped correctly.
- Add Multiple Members:
- If you need to invite more than one person, click on the “Add another one” link to include additional email, role, and discipline fields.
- Send Invitations:
- Once you’ve entered all the necessary details, click the Send Invitations button.
3. Managing Invites
- Pending Invites:
- After sending out the invitations, you’ll be able to see a list of Pending Invites. This section shows who has been invited but has not yet accepted the invitation.
- Active Members:
- Once a member accepts their invitation, they appear directly in the main Members list alongside everyone else already on the project, with their assigned role and disciplines.